Delta Faucet Repair
Regular readers may wonder why this article is on mini-lathe.com. Well, I had to fix the faucet and I thought it might be useful for others with similar faucets.
Also, when I need to do it again, I’ll have the procedure documented :) Plus, I used the lathe to make a few parts to improve the installation. You can use that info to help convince your domestic partner that you really need a mini-lathe.
Problem: the rotating motion of the kitchen faucet has become stiff, causing the base to work loose so that the whole assembly rotates on the countertop and water may leak under the base into the cabinet below.
This article describes the Delta kitchen faucet shown below. Delta makes many styles of faucets and accessories, so not all details of this procedure may apply to other models and probably will not apply to faucets made by other manufacturers.
However, even for other models, some of the tips may be useful.

 Faucet also is a sprayer
There are similar faucets in the laundry room and in my shop. They’re easier to fix than the kitchen faucet.
 Shop faucet
For this work, cut off the water supply to the faucet. Our home uses flexible plastic pipe for the feeds rather than copper. The two valves that control the water flow are push-pull type: pull out to shut off.
Older homes typically will have copper pipe with small chrome faucet handles. The handles often are very stiff to turn, in my experience.
Our retirement home was built in 2008. The kitchen faucet had become loose once previously and, since I was at that time recovering from back surgery, I paid a plumber to repair it (the faucet, not my back).
The nut that tightens the faucet is very difficult to reach, so it took the plumber and his helper over an hour to get it fixed. You’d be right If you guessed that that was not a cheap repair.
So, when the faucet recently worked loose again, I decided to tackle the repair myself. Doing it for the first time took me several hours, but if I had known when I started all of the tips I’ll present here, I probably could have finished the job in under an hour.
The photo below shows the view underneath the sink, looking up to where the faucet is located.
There are two semi-flexible copper pipes for the hot and cold water plus a braided hose for the sprayer - all tucked back between the two stainless steel sinks.

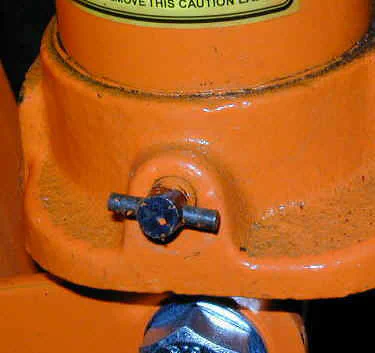
Hidden behind the copper pipe, above the top of the braided hose, is a threaded brass pipe and brass nut that needs to be tightened against the cast retaining ring.
The nut presses the ring tightly against the underside of the counter top.


Hoses and retaining ring removed to show location of brass retaining nut on threaded pipe.
Preparing the Work Area
The first step is to clear everything out from the cabinet below the sink and prepare a comfortable work area. Since you may be under the sink for an hour or more, it pays to set up a comfortable arrangement.
I’m over 60 and have had back and neck surgeries that make lying on my back a little less comfortable.
Plus I have short, beefy arms that make it hard to reach up into the tight confines of the sink, so I have to scrunch way up in there.
Therefore, I positioned two pillows and a foam pad under my back to make it more comfortable.


A clamp-type work lamp with a 75W spot lamp does a good job of illuminating the work area without putting out too much heat. A small fan blowing on me from above keeps me cool.
Now, if I just had a cold beer… Oh, and if other people will be around while you’re working, you may want to wear a Duluth plumbers shirt.


It’s also a good idea to spread out a towel so that your tools don’t chip or ding the counter top.

If you’re lucky, all you’ll need to do is to tighten the nut that holds the faucet assembly to the countertop.
However, due to the pipes and sinks in the way, it can be difficult to reach and hard to turn once you do reach it.
Tightening the Retaining Nut
There’s a handy plumber’s tool called a basin wrench that may help you access and tighten the nut.
It has a T-handle with a head than can rotate to the most convenient angle, along with a spring-loaded cam-type clamping device to grip the nut.
I’ve tried these before and tried it again on this job, but did not have any success with it. This is the type of tool that the plumber who previously worked on our faucet used.
Unfortunately, the wrench rounded off the corners of the brass nut, making it now even more difficult to grip and turn.

 “Basin wrench”
What I ended up using was a 3/8" ratchet socket wrench with a long extension and a “crow’s foot” attachment - basically an open-end wrench head that attaches to the end of the extension.
I bought a set of ten at Harbor Freight for about $10. A similar set at Sears was $40 (!). Both sets were made in China.


It takes some finagling to maneuver the wrench around the various hoses, grip the nut and tighten it enough to complete the job. Due to the pipes in the way, I could only turn the wrench about 1/3 turn on each attempt.
Then I had to rotate the ratchet around to bring the wrench into the proper orientation for a fresh grip and repeat until the nut was tight.
As you’re tightening the nut, the faucet assembly tends to move around, so you may need to enlist a helper to hold it steady from above while you tighten the nut from below.
When you’re done, check to make sure that that the faucet handle spray head lifts easily from its holder and that the braided sprayer hose extends and retracts freely.
You may need to gently bend the copper pipes away from the braided hose so that the hose does not rub against them or the side of the retaining ring.
Lubricating the O-Rings
While the steps above will tighten the faucet, they do not address what may be the root cause of the problem. The faucet rotates on a nylon washer and some O-rings.
When these become stiff and dried out from aging, the faucet no longer turns smoothly, creating drag that loosens the nut. So to do the job right, you need to access and lubricate the washer and O-rings.
Otherwise, you may find that the nut works loose again before long.
To access the O-rings, you need to remove the faucet handle assembly. On the front of the faucet handle is a small blue and red rubber plug.
Before removing the plug, it’s a good idea to cover the sink drain so that the plug doesn’t drop down the drain hole.
Murphy’s Law ensures that this will happen and that, when you flip on the light switch so that you can see better to retrieve it, you will hit the disposal switch instead.

Use a fingernail, small knife or screwdriver to pry the plug from the faucet. Underneath, you’ll find a stainless steel set screw. Use a 1/8" hex wrench to loosen the screw a few turns, then lift the handle off of the faucet assembly.
Set the plug aside somewhere where it won’t get lost.


Use a large adjustable Crescent-type wrench or slip-joint Channel-Lock pliers to grip and loosen the exposed metal shroud, turning counter-clockwise. Use care not to damage or round off the gripping edges.
Once loose, the shroud can be turned by hand until it lifts off.


I found that I could not remove the faucet arm assembly with the sprayer hose in place. Unscrew the end of the sprayer hose from the faucet head and let it drop down through the hole in the arm.
Then you should be able to work the arm assembly back and forth while lifting it until it comes free and lifts off of the underlying mechanism.

On the now exposed assembly, remove each of the two O-rings in turn and lubricate them. A spring hook tool makes this easy to do without damaging the O-rings.
Use a small amount of silicone grease and work the O-ring between thumb and forefinger until the entire surface of the O-ring has a light coating of grease.
Then slip the O-ring back into place. While you’re at it, you may want to lubricate the two O-rings on the end of the sprayer hose, visible in the photo above, and the one on the end of the brass fitting.


There’s a nylon ring under the cap that also should be lubricated.

Routing the hose back through the faucet for reassembly takes a little trickery.
While the O-ring is still removed from the brass fitting, wrap some small diameter wire (I used telephone wire) around the recess where the O-ring goes.
Twist it so that it will hold tightly. Route the other end of the wire through the faucet arm assembly, then, with the hose fully retracted, slide the faucet arm assembly back in place over the faucet base.
Make sure that the two notches in the bottom of the base ring line up with the raised bumps on the gasket at the base of the assembly.
Pull on the free end of the wire to draw the braided hose up through the faucet arm, then remove the wire, replace the O-ring and screw the hose back into the sprayer head.


Install the cap, being careful that it is level so that the threads are not cross-threaded. Make sure you can hand tighten it easily before using the wrench to snug it up.
It does not need to be very tight - just enough to keep it from working loose during normal use. Now replace the faucet lever, tighten the set screw and replace the red and blue plastic plug.
You’re done!
This concludes the maintenance work for lubing the O-rings and tightening the faucet assembly to the counter top.
Procedure for Shop Faucet

The shop and laundry faucets are easier to repair than the kitchen faucet because the sprayer is a separate unit. Here’s the lube procedure:
Shut off water

Remove plug and loosen set screw, lift off handle
Remove cap
Remove faucet assembly

Remove and lubricate O-rings; replace O-rings


Lubricate nylon ring

Replace cap, handle and plug

Turn water valves on
Additional Work
This section illustrates some additional fixes I did to my kitchen faucet, including some for which I made custom parts on a metal lathe.
For those readers who aren’t familiar with my web site, making parts on a metal lathe and mill is what I do, so this was an easy solution for me.
If you want to do a similar fix, but don’t have a metal lathe handy, you might be able to find a suitable washer at a hardware store or online.
Making a New Nut
As I mentioned earlier, the corners of the brass nut that holds the faucet assembly in place had been rounded down during a previous repair in which a plumber used a basin wrench to tighten the nut.
Due to the rounded corners and other damage, I had a hard time tightening the nut and I was afraid that if I got it tightened I might never be able to get it off again if I needed to at some future time.
Therefore, since I was already deep into this project, I decided to make a new nut. I figured that I could do that faster than I could drive to the hardware store and look around for an hour before concluding that they don’t have the part I need.
That happens often. And, what the heck, I like to make stuff on the lathe.
So, with about an hour’s work, I had my new nut:
 Newly made and original nut
I made the nut from some 3/4" (.750) diameter brass rod that I had on hand. 7/8" (.875) diameter would have been a better choice, so that the corners were fully formed, but this nut worked fine.
Not having a tap of the proper size (9/16-18), I cut the threads on the lathe, then cut the flats on the mini-mill.
To replace the nut, it’s necessary to remove the braided hose from the end of the threaded brass pipe. To do that, grasp the handle of the plastic retaining clip and pull it away from the pipe.
I found that gripping the handle in a small pair of Vise-Grip pliers made it easier.

With the clip removed, the braided hose can easily be pulled free from the end of the pipe. Hmmm… there’s another O-ring to lubricate.
Removing the hose opens up another possibility: instead of using a crow-foot socket wrench, now you can use a deep socket to remove the nut - well, maybe.
Turns out that the nut is so far up the pipe, that the longest socket I had would just barely reach it.

Later, on a different sink, I machined an aluminum tube to act as a spacer so the the nut would be close to the end of the pipe when it was tight, thus making it easily accessible with a socket wrench.
Making a Large Washer
While I was under the sink, I noticed that the edges of the hole in the marble counter top had chipped off so that the cast metal ring did not have a solid surface to tighten down on.
I was concerned that tightening the ring might further chip, or even crack, the marble counter top.
 Chipped edges on hole
Therefore, I decided to make a large washer, about 2.5" diameter, from aluminum to seat under the cast ring. After a brief interlude on the lathe, I had it. The cast ring press fits onto the washer


When trying to re-install the ring and nut, I found that I needed a third hand to hold the ring. I used some blobs of wax to hold the ring in place while I tightened the nut.

Re-seating the Gasket
To make sure that no water would leak around the bottom of the faucet, I wanted to clean and reseat the gasket. To do this right requires removing the whole faucet assembly.
Unscrew the hot and cold water hoses, then gently squeeze together the copper pipes so that they will fit through the hole in the counter top; then work the pipes up through the hole until the entire unit is removed.
I marked the copper pipe and the braided pipe for the cold water with blue tape to ensure that I hooked the hoses back to the right pipe during reassembly.

I used a single-edge razor blade in a holder to scrape away the remnants of the previous sealer, then cleaned the surface thoroughly using a small amount of acetone on a cotton cloth.
The acetone helps to remove any remaining residue. Next, I thoroughly cleaned the gasket.


I squeezed a light bead of “clear” silicone rubber sealer onto the bottom of the gasket and pressed the gasket into place surrounding the hole.
Then I worked the gasket back and forth a few times, while applying light pressure, to distribute the sealer evenly over the whole bottom surface of the gasket.
After repositioning the gasket around the hole, I let it sit for several hours for the sealant to set so that it would not shift position when re-installing the faucet assembly.
Reinstalling the assembly is just a matter of reversing the steps used to remove it. After its in place, gently bend the copper pipes outward so that they won’t interfere with the movement of the braided sprayer hose.
Don’t forget to install the plastic clip that holds sprayer hose in place.

Adding a Spacer
Our house has two more stainless steel utility sinks with Delta faucets: one in the laundry room and one in my shop. On these sinks, the sprayer is separate from the faucet.
The retaining assembly is easier to work with because the retaining nut goes on a separate threaded shaft rather than on the sprayer pipe. Also, they are just a lot easier to get access to.
Using the mini lathe, I made a spacer to go between the counter retaining bracket and the retaining nut. The spacer positions the nut closer to the end of the threaded rod so that, during future repairs, I can remove it using a socket wrench.
I didn’t think of this until I was already done working on the kitchen sink, but next time I work on it, I’ll make one for it too.

Well, that wraps it up. Hope you found this page useful.