Sieg X3 Mill
Inevitably, if you’re active in your home or small business metalworking shop, the day comes when the mini-mill is undersized and/or underpowered for some task that is at hand.
On those days, we start to daydream about a bigger mill; not necessarily a big, 1-ton Bridgeport knee mill, but just a scaled up version of the mini-mill or something similar, for under $1000.
Generally, the next step up has been to one of the Rong-Fu style, round-column mill-drills, but now there’s another option to consider…
Over a year ago, Sieg introduced a new mid-size mill, the X3 model, that looked like a good fit, in size, weight and price, for those requiring something a bit bigger than the mini-mill.

Until recently, Lathemaster has been the only U.S. distributor for the X3.
Lathemaster has earned a good reputation for delivering and supporting the X3, and there are several good web sites by those pioneers who purchased their X3 mills from them.
At the start of 2006, Grizzly added the X3 to their catalog as P/N 0463, and there are rumors that Harbor Freight may also offer it.
Update: 03/09/06
The rumors are true: HF now lists the X3 mill on their web site as P/N 93885
End of update
About a year ago, I reached that stage where I “had to have” a larger lathe and mill. Construction work on my new shop was just about finished, and for the first time, I had enough space to accommodate these larger tools.
I had an opportunity to order the X3 mill and C6 lathe directly from Sieg. Unfortunately, not too long after I received them, I was diagnosed with a brain aneurysm and the required surgery set back my time schedule by a bit.
My brain seems to be working OK now, far as I can tell, and I’m getting back into a regular routine in the shop and working on the web site.
With the prospect of wider distribution of the X3 mill in the U.S., this seemed like a good time to do the review I had planned to do a year ago.
I’m going to break my tradition by describing the shipping, cleanup and setup at the end of the article, instead of the beginning. So if you really like things in chronological order, start here.
Head, Quill and Tooling
The head contains the drive gears and quill components. The head and motor assembly move up and down the dovetail column under control of the Z-axis handwheel.
These controls are explained in detail in the Column and Z-Axis Control section.


Similar to Bridgeport-style mills, the head has an extendable quill that holds R8 tooling (Note: apparently there are also versions that use a #3 Morse Taper.)
About 2 3/8" in diameter, the quill can be extended up to 3 1/4" and can be locked in position anywhere within this range by means of the locking lever on the front of the head.
A 3-arm handwheel extends and retracts the quill and can be used for drilling operations much like a drill press. A dial calibrated in divisions of 0.04" accurately tracks the motion of the quill and the knurled ring can be rotated to establish a zero setting.
Located above and behind the handwheel is the Hi/Lo-range gear selector. The legend on the front of the headstock lists the LO range as 100-1000 RPM and HI range as 100-2000.
As with all such gear arrangements, LO range provides increased torque for heavy cutting operations. The central position of the knob is Neutral, in which the quill is decoupled from the gear train.
This setting could potentially be useful for rotating the quill manually for fine drilling or tapping operations.
>


End mills can be held either in end-mill adapters or in R8 collets. I like the E/M adapters for general use, and reserve the collets for when a few inches of extra headroom is required. Here’s a selection of collets, E/M adapters and a boring head.
 R8 tooling - end mill adapters, collet, boring head
The only tooling included with the mill is a nicely finished 3-16mm (1/2") drill chuck with R8 adapter, so be sure to have your end mill adapters and/or collets, milling vise, etc.
on order in time for the mill’s delivery.
 3-16mm chuck included with X3 mill
A press-fitted black plastic safety cap covers the rotating shaft that extends out the top of the head. Removing the cap provides access to the top end of the quill shaft and drawbar.
R8 tooling has a slot that runs lengthwise along the tool shaft. The slot engages with a pin inside the quill, so you must rotate the quill until they engage.
Then the tool is drawn tightly into the quill by tightening the drawbar. Due to the relative steepness of the R8 taper, a light tap on the head of the drawbar with a small brass hammer usually is sufficient to break the taper free when removing the tooling.
By contrast, tooling held by a #3 Morse Taper sometimes requires more testosterone during the removal process.
The top part of the head is a separate casting that can be removed by loosening four cap-head screws. Doing so reveals the inner workings of the drive train, which is a combination of belt- and gear-drive.
 Head cover casting
 Spindle belt drive and gear train
I was very pleased to see the belt drive. If you have read my reviews of the mini-mill, or spent much time on any of the mini-lathe/mill interest groups on the Web, you already know that one of the most common failure points of the mini-mill is the gear train between the motor and spindle.
The reason is that there is no component, other than the gears, to absorb shock if the cutting tool digs in. When this occurs, the result often is that the teeth on one or more of the gears in the drive train is sheared off.
Not only does this put the mill out of service for a while, replacing the gears is fairly expensive. Note: I just received from Stirling Steele, a belt-drive conversion kit for the mini-mill. I will be posting a review on this unit soon.
If you are curious and decide to remove the cover over the motor, please note that the screws holding the cover in place do not need to be removed completely.
The screws are accessed through the four holes in the top of the cover. Just loosen them up and the cover can be slid off. I didn’t discover this until removing the cover the hard way - and losing one of the screws in the process.
Motor and Electronic Controls
The motor is mounted on the left side of the head. At 8" long X 3 1/2" diameter, it is about twice the size of the mini-mill’s motor. I could not find a HP rating on the motor, in the manual, or on the Sieg web site, but it is rated at 600 Watts.
At 750 Watts per HP, this would make it about 3/4 HP, which is how it is rated by Grizzly. In any case, the motor seems plenty powerful for the work I have tackled on the mill so far.

Like the mini-mill and mini-lathe, the X3 mill has an electronic fully-variable speed control. This is a little unusual on a motor this powerful, but I’m glad to have it since I lack the patience to enjoy changing belts and pulleys for speed control.
I also like the ability to adjust the speed “on the fly” if it is obviously too fast or too slow for what I’m doing.
Located about mid-way up inside the black sheet metal enclosure at the back of the mill, the motor control board is well protected from metal chips, oil and cutting fluid.
 Variable speed solid-state motor controller
The speed control knob is mounted on the right-hand side of the enclosure for the vertical column, near the back. Also located there are the power switch and forward/reverse switch for the motor, and the fuse holder.
I found this location to be somewhat awkward. At 5’ 6", I’m short of stature, and my arms are proportionately foreshortened.
If I stand directly in front of the mill with the Y-axis handwheel just touching my stomach, and reach back to the controls with my right arm, the controls are about 6" beyond my reach.
Hmmm, maybe if I lost a few pounds…, nah, I still couldn’t reach ’em.
 Electrical motor controls on right side of column
This isn’t too big a deal for two reasons: (1) Since the handwheels for the X and Z axes are mounted off to the right side of the mill, I find that I stand off to that side while working.
This brings the electronic controls within reach. (2) It looks like it would not be too difficult to relocate the variable speed control, or all of the electrical controls, around to the front of the mill.
I haven’t tried this, but it looks like a mod I’ll try before too long.
In the photo above, the fuse holder is at the top, followed by the variable speed control, the forward/reverse switch and the on/off switch. On other X3 web sites, I have seen a slightly different configuration.
There’s also an emergency on/off switch located on the front of the mill, on the left side of the head. The emergency switch turns off the motor when you press in on it.
It’s designed as sort of a “panic button” that you can mash down in an emergency to stop the mill motor.
If you then rotate the knob clockwise, as indicated by the arrows, the button will pop back out to its normal position and the yellow FAULT light comes on.
When the FAULT light is on, the FWD/REV or Power switch on the right side of the column must be recycled to restart the mill.
The FAULT light will also come on and the mill will stop if the motor is stalled - for example by digging a tool too deeply into the workpiece.
Finally, the FAULT light will come on when power is restored after power is interrupted at the wall socket - due to a circuit breaker tripping, a lightning storm or any other cause.
This prevents the mill from coming back to life unexpectedly when power is restored to the circuit.
 Emergency cutoff switch
Column and Z-Axis Movement
The head is raised or lowered on the dovetailed column by means of a leadscrew located inside the column. The leadscrew is controlled by the Z-axis handwheel located on the right side of the front of the mill base, and is supported by bearings at both ends and by a backlash-limiting bearing where it engages with the head.
Also located within the column, a compressed gas strut, like you often see supporting hatch-back doors on cars, offsets the weight of the head.
 Rear of column with sheet-metal housing removed
 Top support bearing
 Bottom support bearing and bevel gears
 Bearing and gas strut attached to head support bracket
 Steel yoke supporting the head, and locking lever
The strut limits the downward range of movement of the head. With the head all the way down, the bottom of the spindle is about 5 1/4" from the surface of the table.
Although, in principle, it would be nice if the head could move down closer to the table surface, I would not anticipate too many situations where this would matter.
Even when using a collet to hold a short cutting tool, the tip of the tool is within an inch of the top of milling vise. The quill can also be extended up to 3 1/4" from the head, bringing the tip of the cutting tool to within an inch of the table surface.
I suppose if this ever became a big problem for some reason, the strut could be replaced with a counterweight system. In the Files section of the Lathemaster Yahoo group, there’s a file “X3 modifications.pdf” that illustrates this modification.
Or maybe just remove the gas strut? Interestingly, I noticed that the Grizzly site specifies a range of 14 7/8" and the parts explosion in the manual does not show the gas strut.
As you can see in the photos above, the leadscrew that raises and lowers the column is connected to the handwheel on the front of the mill by a pair of beveled gears.
The head’s range of movement is about 9 1/2", with the face of the spindle about 14 3/4" from the table when the head is at the topmost position and about 5 1/4" from the table at the lowest position.
For routine work, the head can be positioned at a convenient height above the milling vise and the spindle extended to contact the work, but for maximum rigidity, it is best to have the quill fully retracted.
Table, X and Y Axis Controls
Machined from cast iron, the table is 6 1/4 x 21 3/4" in size. There are 3 slots for T-nuts, .470 wide and I found that the 7/16" (.4375") T-nuts that I use on the mini-mill fit nicely. For those of you who may not be familiar with them, T-nuts are special nuts, with a cross-section that looks like an inverted “T”.
They fit within and can slide along the slots in the table and, for setups where a vise will not work, are used to secure the work being milled to the table surface.
Typically, they are purchased as part of a set of clamping accessories designed for this purpose.


Along the front and back edge of the table are shallow channels for coolant runoff. A screw-plug on the back left side of the table can be removed to attach a drain for collecting the coolant.
Both the X- and Y- leadscrews are Imperial 10 TPI threads. On the X-axis, a heavy cast-iron handle provides inertia to help keep the table moving smoothly and easily.
A decoupling connector is provided to disengage the handwheel when the optional Sieg power feed is engaged. This keeps the handle from whipping around and knocking into things - possibly including various parts of your body.
The Y-axis handwheel is slightly smaller and lighter than that on the X-axis, which is fine, since movements along the Y-axis are typically fairly short.
 Coupling for disengaging X-axis handwheel
Nicely engraved and easily readable dials mark off the rotation into 100 divisions of 0.001" per division. This is a big improvement over the mini-mill, on which the 16 TPI leadscrews result in 62.5 divisions per rotation making it an exercise in mental gymnastics to keep track of how far you have moved the table when using the dials for reference.
(note: the Micro-Mark mini-mill is an exception, with 20 TPI leadscrews).
The calibrated dial can be rotated independently of the handwheel in order to set the dial to zero and a nicely knurled rim provides a gripping surface to expedite this action. All of the handwheels include ball bearing races for smooth action and reduced backlash.
 Calibrated X-axis scale (Y-axis is the same)
 Bearing race for smooth operation
A slot runs along the front side of the table, apparently for use with automated stop or reverse switches used with the Sieg power feed. Below the slot is a 16" rule, centered on zero, for use when thousandths of an inch are more precision than necessary.
A black locking lever can be engaged to lock the table to prevent movement in the X direction. This comes in handy when drilling or any other operation where X-axis motion is not needed and maximum rigidity and accuracy is desired.
An identical lever for locking the Y-axis is located below the right side of the table. A bonus feature of these locking levers that may not be immediately apparent, is that they are spring-loaded and can be adjusted so that they don’t get in the way of other parts.
To adjust, first tighten slightly, then pull out on the handle and move it clockwise or counterclockwise to the desired position, then release it. Here’s a photo showing the internal parts of the levers:
 “Exploded” view of locking lever
Along the front of the casting that supports the table are four gib screws and locking nuts. For the uninitiated, gibs are strips of metal with a diamond-shaped cross-section that are used in dovetail slides to take up any play.
This minimizes any side-to-side movement of the dovetail, and provides a way to keep the machine tight and accurate as it wears in with use.
When the screws are tightened, they press the gib strip against one side of the dovetail slide.
The trick is to get the screws just tight enough to minimize any slop, but not so tight that they impede the motion of the table.
 Front of mill table showing X-axis gib screws
 Right side of mill base showing Y-axis gib screws
At the left end of the table, the X-axis leadscrew is supported by a bearing. The end-plates at both ends of the table include alignment pins that match up with holes in the end of the table to ensure precise alignment.
This feature helps to ensure that the leadscrew is properly aligned along its entire length to prevent binding.
The leadscrew nuts for both the X- and Y-axes are machined from brass and have a slot cut into them to allow adjustment for minimizing backlash as the nuts wear-in with use.
 Y-axis gib and adjustable brass leadscrew nut
Shipping and Receiving
Since my machines were shipped directly from the Sieg factory in Shanghai, I had to do some interaction with the importer and trucking company to get them through customs and guide them to my garage door.
Having never done this before, I found the process a little arcane. If you can order the X3 directly from a U.S. distributor, you can skip that part.
The X3 mill is too heavy for UPS delivery so be prepared for a fairly large truck - up to semi-trailer size - to show up at your delivery address. If your location won’t accommodate a large truck, you’d be well advised to work this out with the shipper in advance.
One thing to watch out for: unless you specify otherwise, most trucking companies will assume that they are delivering to a loading dock.
If you are having the mill delivered to your home or a location without a loading dock, be sure to specify that it be delivered by a lift-gate truck - otherwise you will have no way to get the mill off of the truck onto your driveway and into your shop.
 X3 Mill and C6 Lathe in the garage
I’m no expert on these matters, but my experience has been that the truck driver generally is obligated only to get the box off the truck and onto the loading dock (or driveway).
If you are lucky, as I was, the driver may help you move the machine into your shop, garage or other holding area, using a pallet truck. This can be a big help, since moving a nearly 400 lb.
shipping crate is usually not a trivial matter for the average homeowner. If the driver does help you out, a $10 tip would be a nice gesture.
The mill is shipped in a wood crate and is bolted to a reinforced plywood and particle board base. From the web sites I have read, X3 owners have all received their mills without shipping damage, as did I.
You’ll need some tin snips to cut the metal bands - or just twist them back and forth with pliers until metal fatigue breaks them apart.
I found a furniture dolly from Harbor Freight to be very useful for moving the machines around until I could get them into their permanent locations.
Since, in my case, this took nearly a year, being able to move them out of the way was a big advantage.
 Mill on furniture dolly, still covered with red packing grease
Cleanup
All of the imported machine tools come coated with a generous layer of thick wax-like grease to protect them from rust while in transit from China. Kerosene or WD-40 (in liquid, not spray form) are good choices to dissolve it and, along with some rags and chip brushes, is all you need to clean up the lathe.
Elsewhere on my site, I’ve gone into a lot of detail on cleaning up this gunk, so I won’t go into a blow-by-blow description here. After doing this type of work on the floor of the garage a few times, I later smartened up and realized that it’s a lot easier to do when the machine is already up on the bench.
Note: My digital camera does not accurately record the red color of the mill. Although it looks orange-red in the photos, the real color is a much deeper cherry-red or blue-red.
The picture of the mill on the dolly is pretty close to the real color.

The general procedure is first to clean up all of the grease visible on the external surfaces of the machine. Everybody seems to have their own method, but I like to use a 2" or 3" chip brush dipped in kerosene for this work, followed by a cleanup with a cotton rag (this, of course, is what happens to all the used T-shirts around my house.)
After cleaning up the outside, the next step is to remove the table and clean up the dovetails and leadscrews.
I also removed the gib screws and lock nuts and soaked them in the kerosene bucket for a few minutes to remove the grease. Some owners prefer to completely disassemble their machines to ensure a thorough cleanup. I did not want to remove the column or the head, but I was still able to get all of the visible grease off.
Bench Mounting
You will need a very sturdy bench to support the mill. If you buy a commercially-made bench, make sure it can support at least 500 lbs., since with accessories and the mill, you can easily get to that limit - even better, I would recommend a 600 lb.
limit. A bench with wheels is a big advantage to move the mill for cleaning up the shop or if you decide to rearrange your shop layout. In fact, I now have a rule that every bench and tool stand in my shop be on wheels.
This has been a great feature when I want to explore new shop arrangements, or just do a thorough cleanup.
For several reasons, I decided to make my own benches for the X3 mill and C6 lathe:
- Relatively low cost - around $100 per bench (including $50 Formica top)
- Opportunity to customize size to fit my shop and height to my work style
- Needed benches that would work effectively and safely with my ramp/winch system (see below)
The downside to making your own benches, of course, is that it takes time. If you decide to make your own, be sure that you make them strong enough to safely support these heavy machines.
Once you have your bench in place, you may have an interesting time figuring out how to get the mill up onto it. One tried and true method is to disassemble the mill and reassemble it on the bench.
I don’t particularly like that approach since there’s always the possibility that things won’t go back together just right. Another method is to enlist the help of 3 or 4 strong, healthy guys.
This could be pretty easy, but you can quickly wear out your friends’ generosity if you have to call them back a few times to move it again.
Also, I hate to think about the possibility of someone’s back getting thrown out (or something even worse happening) when lifting a heavy and awkward load such as this.
WARNING: Moving heavy machinery can be dangerous; even potentially life-threatening. The following descriptions are not a recommendation that you use these techniques.
Since each shop and situation is unique, you will need to take actions appropriate to your own situation.
Make sure that whatever method you choose is safe and that you have provided a way out of danger if things do not go according to plan.
Take time to consider what might go wrong. If you are not confident in your ability to safely move heavy equipment, get help from someone with experience, or hire a professional.
Work with a partner in case an accident occurs and emergency help is needed.
Some owners faced with this challenge have employed so-called “come-alongs” to lift their mill onto the bench.
While this may work, if you’re lucky, the thought of a 350 lb., $1000 machine dangling from a cheaply-made winch, kinda gives me the willies. I don’t recommend this approach, but if you consider it, make sure that whatever you attach the winch to can handle the weight.
Keep in mind that the stated capacity of such tools may refer to pulling a load along a flat surface (hence the name) - *NOT lifting a load off the floor - *note that the Harbor Freight link above explicitly states that the come-along is not for lifting.
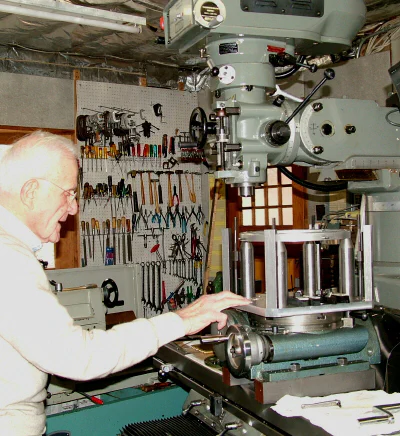
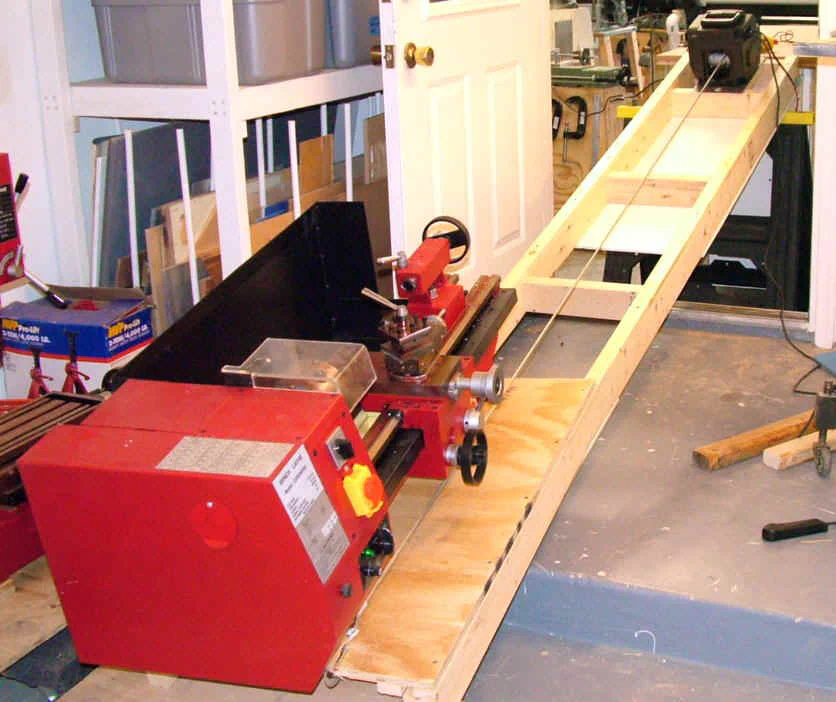 X3 mill being hauled up the ramp onto the bench
My own solution was to build a ramp from 2x4’s and plywood and then employ a 12V electric winch to haul the mill from the floor up to the bench. I had a pretty good experience moving the C6 lathe this way, but was a little concerned whether it would work as well for the much more top-heavy X3 mill.
In practice, it worked out very well. One thing I like about this approach is that the machine is supported at all times by the ramp.
As long as you select good-quality lumber, free from large knots and other defects that could become a point of failure, and avoid splitting the lumber with oversize nails or screws, the ramp can be quite strong.
Movement of the mill up the ramp is slow and controlled and you can stop in mid-move, if necessary, and make adjustments.
Even after you get the mill up on to the bench, the fun does not end. Moving it around on the bench without gouging up the benchtop is another thought-provoking exercise.
Thinking, I have found late in life, sometimes produces results more effectively than swearing. Nevertheless, on a project like this, profanity, judiciously applied, seems to help.

Along with that, I employed a small pry-bar and a variety of 1x2 and 2x3 wood blocks, plus some thin wood shims. Working carefully and levering the mill by small amounts on each operation, I eventually got it where I wanted - and safely.
If you use a technique like this, be sure the keep your fingers out from underneath the mill at all times. If you need to move a wood block underneath, or out from underneath the mill, use a piece of wood or other tool rather than your fingers to do this work.
Again, let me be clear that this is not a recommendation that you use this approach- whatever method you select must be your own decision appropriate to your own needs, experience and circumstances.
Conclusion
If you’re in the market for a mid-size milling machine for hobby or light industrial use, the X3 should certainly be on your prospect list. Over the last few years, Sieg has established a solid reputation for manufacturing good quality machine tools at excellent prices.
Obviously, in terms of capacity, the X3 is a much more capable machine than the mini-mill, and you will find that the extra attention to details on this mill, such as the copious placement of oil access ports, adjustments for backlash and 10TPI leadscrews make it a better all-around machine.
At around $1000, it’s a substantial investment, but if you are serious about machining, I’m confident that you’ll find it to be a good value.
Due to its relatively large table size, a power feed is highly recommended. I haven’t had a chance to evaluate the Sieg power feed for the X3, but I would expect it to be a real time saver when making long and/or repetitive cuts along the X-axis.