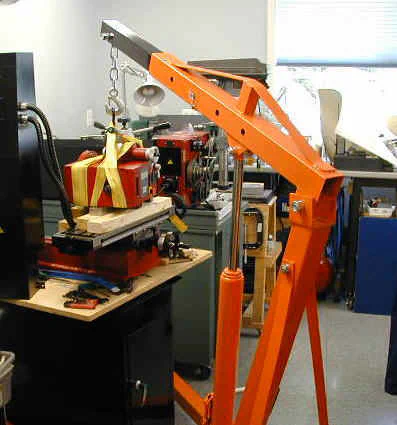
Harbor Freight Folding Shop Crane
Regular readers already know of my adventures in moving heavy machine tools around the shop.
You may recall, that after considering several alternatives, including shop cranes, that I ended up using a ramp and winch solution. This choice was strongly influenced by the layout of my shop, which has a door into the adjoining garage.
But there is concrete floor raised about 6" higher than the garage floor, between the garage and the door to the shop. This obstacle made the ramp a good choice for my needs, and would have been difficult to work around using a shop crane.
I was also reluctant to buy a shop crane since it would be used infrequently, but would tie up valuable floor space when not in use.
Time goes by…
As much as I like the mini-lathe and mini-mill, as financial resources and free time have permitted, I have gradually upgraded my shop to include the larger Sieg C6 10x20 lathe and X3 mill.
The shop started to get intolerably crowded when I added a Super X3 mill some months back.
It was never my intention to keep both mills; my plan from the outset was to sell the X3 mill, but I needed both on hand for a while so that I could do some comparisons for my review articles.
The reviews are pretty much wrapped up now, so it’s time to clear out the older X3 and regain the space that it’s taking up.
Unlike the mini’s, these full-size machines weigh over 300 lbs., so you need some kind of lifting mechanism to move them around.
While the ramp & winch is fine for “once-a-year” moves, it is time-consuming and cumbersome to set up and take down if you need to move machines around frequently.
Thus, I began to consider, once again, the utility of a shop crane. Things came to a head when I had to move the Super X3 into the shop. Key to my ramp solution, is the fact that my work benches are made to support one end of the ramp.
But the X3 came from Sieg with a metal cabinet stand to which there was no easy way to attach the ramp.
Scanning the latest Harbor Freight sale flyer, I saw that they had a folding shop crane on sale for $129, so I decided to give it a shot and worry later about how and where to store it when the immediate task was completed.
I zipped on down to the nearest HF store, about 20 miles from here, loaded it into the pickup truck and brought it home.
Setup
The shop crane is packed in two separate cartons - each of which is pretty heavy. The crane weighs around 170 lbs., according to the instruction manual, and takes about 60-90 minutes to assemble.
![]()
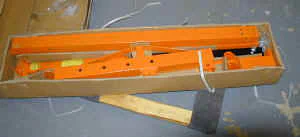
Assembly is pretty straightforward, except that a few of the nuts are located inside the ends of the hollow steel support legs of the crane.
Getting the nuts started on the ends of the hidden bolts, along with washers, proved to be one of those jobs that led to the use of profanity.
I can’t remember now, how I solved the problem, but I think that I ended up using a magnetic holder to get the nuts started onto the bolts.
Once you get ’em started, an open-end wrench is all you need to hold them while you tighten the head of the bolt with a ratchet socket wrench.
When you buy the crane, be sure to pick up a pint or a quart of hydraulic fluid, since it is not included with the crane.
You will probably need to add some to the piston before you can use it, and you really don’t want to have to make another trip back to the store, just for the fluid.
Just in case, you can get it at Lowe’s or Home Depot, and I think I have even found it at Wal-Mart, in the automotive section where they sell hydraulic jacks.
Adding the fluid is tricky, since it goes in through a small hole in the front side of the hydraulic piston.
To keep from getting the fluid all over the shop floor, I poured it into an trigger-type oil can that came with the X3 mill and used it to pump the fluid into the hole.
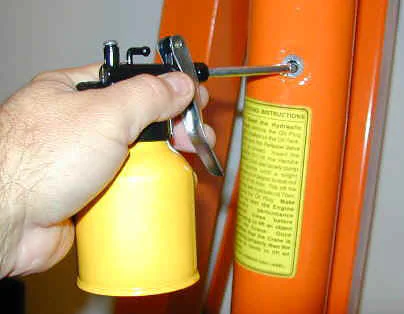
Topping off the hydraulic fluid
Operation
Operation if pretty simple: the lifting arm is pivoted at the back end, and raised or lowered by the hydraulic ram. The lifting arm consists of an outer sleeve and a moveable inner arm.
Moving the arm further out gives you a wider range of motion, and more clearance, but less lifting capacity. The nominal “1-ton” capacity pertains only when the arm is in the fully retracted (i.e. shortest) position.
When the arm is fully extended, the lifting capacity is reduced to 1/4 ton (500 lbs.). This is important to keep in mind if you are planning to use the crane for equipment weighing 500 lbs. or more.
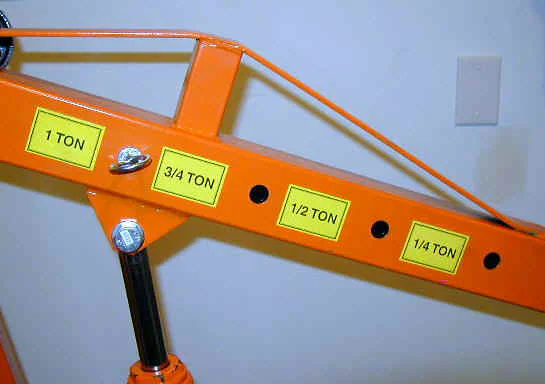
Arm extension settings
Once assembled, all of the adjustments to the crane, such as extending the lifting arm or folding the legs, are done by removing and inserting heavy-duty locking pins.
The pins slide in or out through holes in the frame, and are secured in place by spring clips that go through a small hole in the end of the pins.
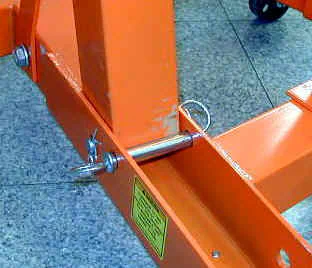
Clevis-type locking pins hold the legs in raised position
Aside from the convenience of storage, I found that the ability to fold the legs up came in handy while trying to maneuver the crane around the tight confines of my shop.
In several instances, I folded up just one leg, for ease in moving the crane to straddle a bench.
One leg folded up for better maneuverability
Similar to most low-cost hydraulic jacks and tools, the hydraulic ram is operated by attaching and extension handle, which is pumped up and down by hand to raise the piston, and thus the lifting arm of the crane.
Before you begin lifting, you must close a small T-handle valve at the base of the hydraulic ram. The end of the removable handle has a small notch cut into the end for this purpose.
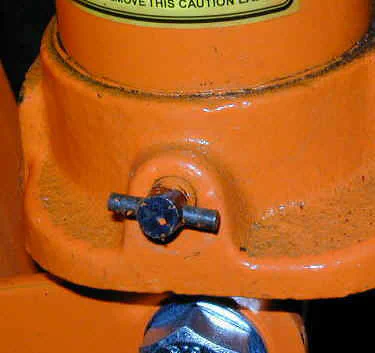
Valve controls flow of hydraulic fluid
To lower the lifting arm and the load, the extension handle is removed from the pumping position and is used again to carefully and slowly open the T-handle valve.
This allows the hydraulic fluid to flow from the piston chamber back into a reservoir, lowering the piston in the process.
As long as you open the valve slowly, the downward movement of the lifting arm and the load can be controlled very easily - by fractions of an inch at a time, if necessary.
I found it convenient to add a stubby handle, for raising the arm more quickly, when there is a light load or no load attached. The handle is merely a 9" length of 7/8" diameter aluminum rod.
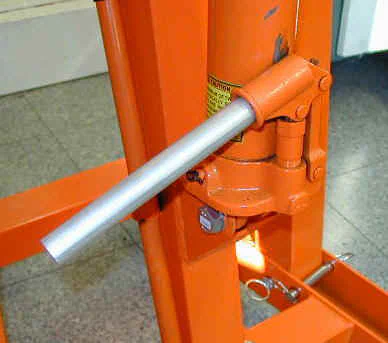
“Stubby handle” for quick lifting
Warning: moving heavy objects is inherently dangerous. Before you attempt these types of operations, be sure that you have a good understanding of the skills and risks involved.
If you do not have the appropriate skills, work with someone who does. Test your equipment and procedures with lighter loads (e.g. 50 lbs.) before attempting to move or lift heavy loads.
It is always a good idea to have a partner on hand in case something goes wrong and you are injured or trapped by a heavy object.
Information presented here is to be used entirely at your own discretion and risk.
Unless the object that you are lifting has a conveniently placed eyebolt (which, of course, never happens in real life) you will need some additional straps, chains or ropes to secure the load.
I have found that heavy-duty nylon straps, often sold as “towing straps”, are handy for lashing up the load.
I start by hooking the hook on the end of the strap to the hook on the crane, then wrap the strap around the load several times, passing the loose end back through the loop on the hook, being careful to avoid sharp edges and appendages that might get bent or broken during lifting.
Before lifting, I tie off the end of the strap - both to secure it and to keep the loose end from getting in the way during lifting and moving the load.
As you start lifting, watch the strap carefully to make sure that it is not slipping or shifting position.
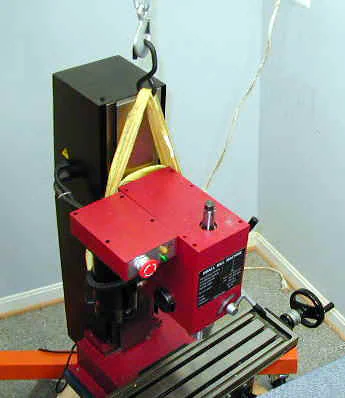
Many of the objects that you may need to lift are irregular in shape and in the distribution of their weight. A lathe is a good example: it is long and unwieldy and the weight is more concentrated towards the head end.
Therefore, when lifting any object, you need to think ahead about the weight distribution and center of mass (COM). Naturally, you will want to attach the lifting hook as directly as possible above the COM to keep the load from tilting wildly to one side and possibly slipping.
With a heavy load, this could be disastrous. Although you can “eyeball” the load and try to predict where the COM is, you generally won’t find out how good your estimate was until you actually start to lift the load - so lift slowly and carefully, and be ready for surprises!
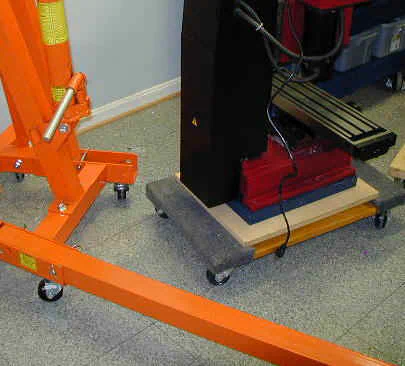
Fortunately, the crane has a pretty good range of vertical motion making it easy to move even a relatively tall load such as the X3 mill up onto a workbench.
But keep in mind that if the boom is retracted to handle heavier loads the range of vertical motion is correspondingly reduced.
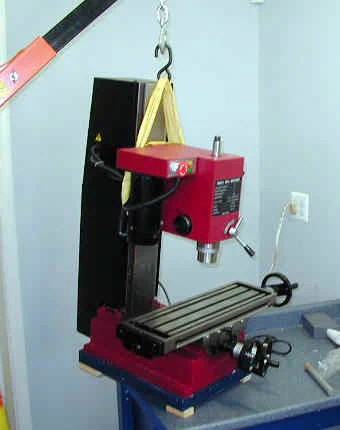
Lifting the mill off of the bench
Although the wheels on the crane make it possible to roll the crane around with a load suspended from it, you must be very careful when doing so, as the load can start to swing back and forth, creating a potentially dangerous situation.
If you need to roll the crane with a load attached, make sure that the floor is free from debris that might get caught under one of the wheels.
If you are moving the load more than a foot or two, it’s a good idea to secure it with some guy lines or rubber shock cords to keep it from swinging.
Before you lift the load, you may want to think ahead to where you’re going to put it and how you’re going to get it to where it needs to go. As much fun as this is, you generally won’t want to move things twice, when you could have moved them once.
I lowered the mill onto a furniture dolly, also from HF (SKU 38970), for convenience in moving it out of the way while I was working on the next step.
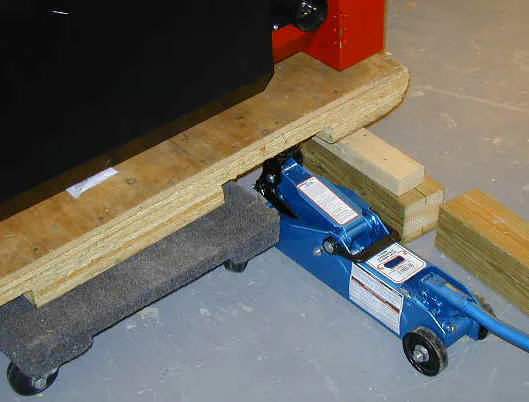
Lowering the mill onto a furniture dolly
After I was done moving the X3 into place on its stand, I was pleased to see that the folding crane could easily be stored in the end of my garage, taking up very little floor space, but ready for use when needed.

Crane folded and stored out of the way
Conclusion
Well, I’ve been pleasantly impressed by the folding shop crane and I’m glad that I bought it. Had I known then what I know now, I might have been able to get by without the ramp and winch solution.
Due to the raised floor at the end of my garage (see photo above), I would have had to move the lathe and mill in several steps: one to get it up onto the raised area; next to lower it through the shop door into the shop and finally to lift it up onto the workbench.
Since the crane is quicker and easier to use than the ramp & winch, I don’t think that the three-step process would take any longer.
On the other hand, I have not yet attempted to lift and move the C6 lathe using the crane, and that might be considerably more difficult than moving the more compact X3 mill.
Update 12/27/07
I’ve had the shop crane for about a year now, and learned more about what it can and can’t do. While very useful in many lifting situations, it is not well-suited to situations where the legs can’t easily be positioned directly under the load.
Therefore, in my shop situation, it has supplemented but not replaced the winch and ramp.
End of update
The corners of some of the metal frame pieces are pretty sharp, so you may want to take some time, as I did, to round them off with a file or grinder.
When you’re in the middle of moving heavy equipment around, you really don’t want to gouge a chunk of flesh out or your leg.
One downside to the crane is the long length of the legs. When the crane is used in what is perhaps its most common application - pulling engines from vehicles - the legs tuck under the vehicle and are not a problem.
In my crowded shop, though, moving the crane around can be problematic. Fortunately, as already mentioned, you can fold up one or both legs while moving the crane into position.
Another issue is that the clearance under my benches is too low (about 5") for the legs of the crane to pass underneath but they are too wide for the legs to easily span either side of the bench.
I was able to work around this problem, but if I had known ahead of time that I would be using the crane, I might have built the benches with more clearance underneath (7 1/2").