Review: Sieg U1 Vertical / Horizontal Mill
How about something really different?
Recently I received from Sieg an evaluation sample of a new product: the U1 Vertical & Horizontal mill. Vertical mills, since the 1950’s or so, have become much more common than horizontal mills, but it wasn’t always that way. The horizontal mill was developed first and for many years was a workhorse machine found in many machine shops.
Horizontal mills excel at making linear cuts such as slots, shoulders, splines and keyways and cutting gears. For a given size of mill, horizontal mills generally can take deeper cuts, due to the cutting tool arbor being supported at both ends.
Horizontal mills can also do gang milling where two or more cutters are spaced along the arbor to cut multiple grooves in one pass over the workpiece. Using specially shaped cutting tools, together with an indexing head, the horizontal mill can quickly and accurately cut gear teeth.
Vertical mills are more familiar to most users: they operate much like a very rigid drill press combined with an X-Y table and control of the cutting tool height on the Z-axis. Unlike a drill press, however, the vertical mill is designed to use the sides of the cutting tool to cut grooves or to cut along the sides of a workpiece.
The U1 combines both capabilities, making it an interesting and versatile machine. So let’s take a close look at this new tool and see what it can do…
Unpacking and Cleanup
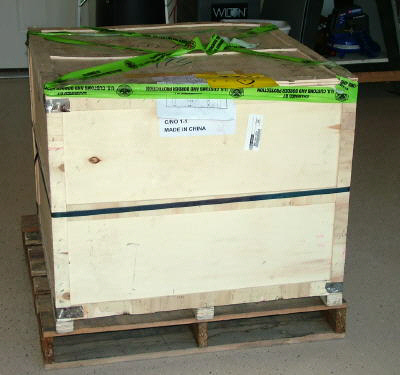
Shipped directly from the Sieg factory in Shanghai, the U1 was well-protected in a wood crate with a pallet base. With the packaging, the gross weight of the mill is about 250 lbs. or 115 kg.
The delivery truck had a lift-gate and the driver kindly rolled the crate into my garage using a pallet truck. The green tape on the crate verifies that the package has been inspected by US Customs.
Regular readers of mini-lathe.com may know that I moved to a new home in June 2010. Recently, I installed a 1100 lb. winch in the ceiling of the garage and also bought a hydraulic lift table from Harbor Freight.
These two new toys tools along with my existing arsenal of moving tricks give me a lot of options for moving machinery up to 1000 lbs. More about that in another article coming soon.
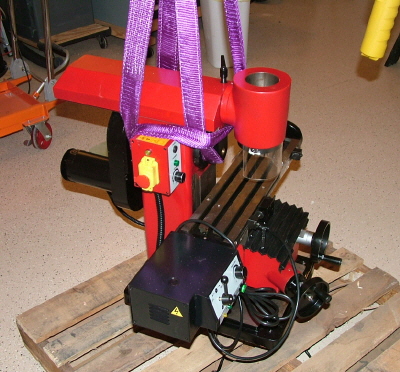
After opening the crate, I used the winch to lift the mill onto the lift table. Compared to what I had to do to move machines into my old shop, it was almost too easy!
Due to limited space in the shop, I did the cleanup on the lift table in the garage. That also provides for much better ventilation when working with kerosene or other solvents to do the cleanup.
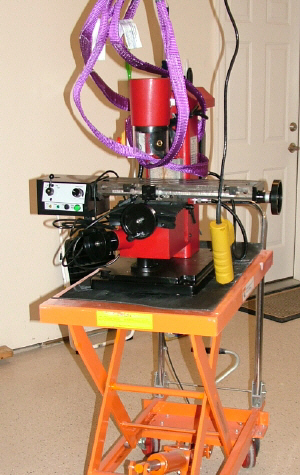
Once on the hydraulic table, I did the usual cleanup with rags, chip brushes and kerosene to remove the red packing grease from all of the exposed metal surfaces. There was less grease than was common years ago, which made the cleanup go quickly. There was no rust or damage on any part of the machine.
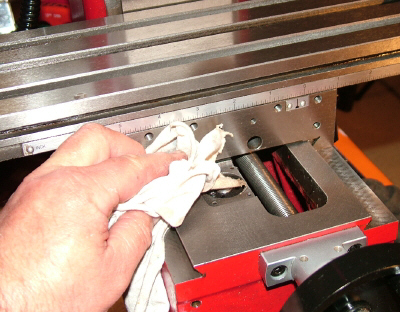
In short order, I had the mill cleaned up and ready to test.
Physical Construction
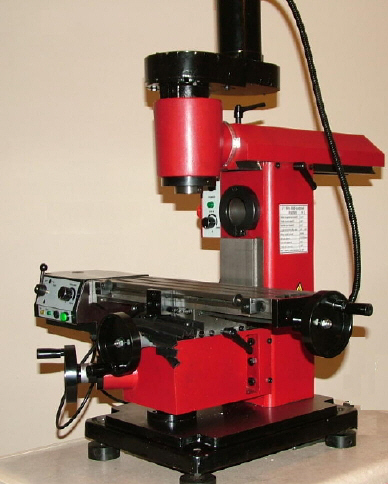
As you might expect, the U1 mill looks like a scaled-down version of the large vertical-horizontal mills used in industry. Unlike those mammoth machines, that typically weigh several tons, the U1 weighs about 210 lbs. (95 kg). That’s heavy enough to keep the mill rigid while still making it reasonably portable within the limitations of the home shop machinist.
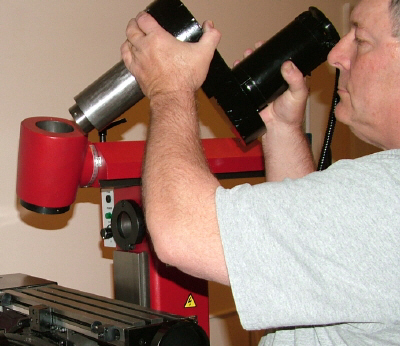
While the industrial machines have separate spindles, drive trains and motors for the horizontal and vertical configurations, on the U1, the same spindle and motor is used for both. It is moved into the desired position before beginning operations.
Changing modes is fairly quick and easy, taking a minute or two once you get used to it, but does require hefting the drive assembly into position. At about 21 lbs. (9.5 kg) this isn’t too bad if you position yourself optimally before you lift it, but you’ll want to plan your work to avoid having to move it more often than necessary.
Knee Assembly
Much like on Bridgeport-style knee mills, the table on the U1 is supported from below by a heavy casting that is raised and lowered by a jack screw located within the knee casting. This is a different arrangement from all of the other Sieg mills that I have reviewed, in which the table is attached to a fixed base casting and the head is moved up and down a column.
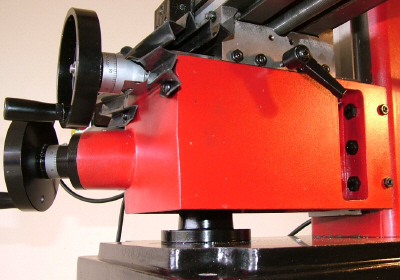
While this arrangement provides a very rigid setup, the headroom is quite limited – the maximum spacing between the spindle and the table surface, is only 6″ on this mill, compared with about 12″ on the mini-mill. Also, while the rack and pinion drive on the mini mill head lets you rapidly move it up or down the column, it takes quite a lot longer to move the knee up and down using the geared leadscrew on the U1.
The headroom space limitation is most obvious when the drill chuck is installed in the spindle. It’s a very nice chuck; the same chuck provided with the mini-mill, but even with the table cranked to it’s lowest position, there’s only about 1/2″ clearance from the face of the chuck to the top of the 2-1/2″ inch-tall machinist’s vise that I use as my standard vise on the mini mill.
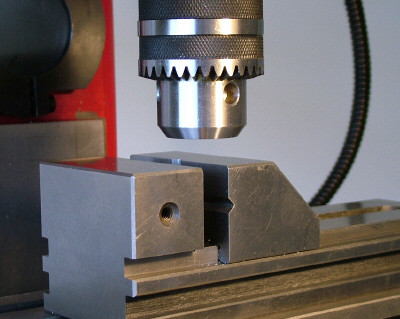
This narrow clearance seriously limits any drilling operations. Even if the clearance were much greater, drilling would still be inconvenient since there’s no three-spoke handwheel. So the U1 must be regarded as a specialized milling machine that offers horizontal as well as vertical milling capability, but very limited drilling capability.
To take best advantage of the available headroom, a low-profile vise is recommended. End mills are held in collets since there’s not enough room to accommodate the extra length required by end-mill holders.
Base
A heavy, ribbed casting makes a sturdy platform to support the U1 mill. The corners are drilled and tapped for bolting it down to a workbench or to install adjustable-height feet for leveling and to provide clearance for the vertical lead screw.
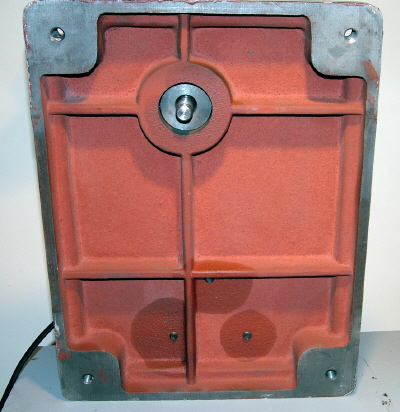
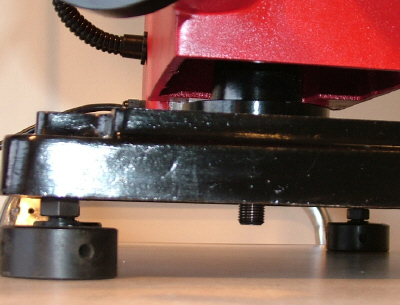
When the knee is at the lowest position, the bottom end of the jack screw extends below the base casting, so the mill should be supported on spacers or feet.
Although they weren’t included with the sample mill that I received, I had a set of sturdy feet that came with another Sieg mill and they fit into the pre-tapped holes in the base of the U1. The feet are individually adjustable for leveling the mill.
Column
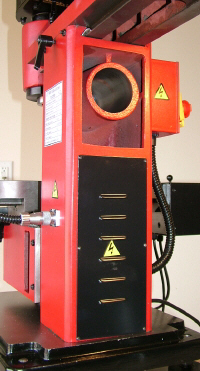
Made from a single sturdy block of cast iron, the column supports the overhead arm as well as the knee assembly. It is bolted to the base with three bolts. Inside the column is located the electronics control board which will be covered in more detail later in this review.
Overhead Arm
Mounted in a dovetail slide at the top of the column, the overhead arm, also known as the overarm or ram, is positioned forward or backward when changing the mill configuration between horizontal and vertical modes of operation.
For vertical milling the arm generally is positioned so that the spindle is centered approximately over the midpoint of the table’s Y-axis travel, while for horizontal milling the arm is extended towards the front of the mill to support the unpowered end of the horizontal milling shaft.
As with the other dovetails on the mill, this one has an adjustable gib to optimize the motion of the dovetail slide and to compensate for wear of the slide over years of use.
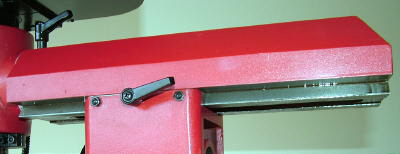
One interesting benefit of the moveable arm is that for vertical milling operations the spindle may be offset more towards the front of the mill to accommodate large workpieces that otherwise would be too large to machine. I’ll demonstrate an example of that later in this review.
Table
Milled from a large casting the table is nicely finished. Dimensions are 4-3/4″ x 18″ (120 x 460 mm) with a range of movement of about 3-1/2″ x 11-1/2″. This is slightly larger than the mini mill table which is about 4″ x 15″.
There are three 12mm T-slots for clamping vises or other work-holding devices to the table. Across the front of the table, a scale graduated in inches with a zero point at the center, aids in centering work on the table.
X-, Y- and Z- Axis Movement
X- and Y-axis movement of the table is controlled by handwheels made of solid cast iron with roller handles made from tough black plastic. Each rotation of the handwheel turns the 16 TPI leadscrew and moves the table by 1/16″ or 0.0625″.
Calibrated scales on the handwheels enable precise control of the table position and can be set to zero at any position by rotating the calibrated collar while holding the handwheel so that it does not move. Sharply etched, high-contrast scale divisions, as found on all of the Sieg machines, make the dials easy to read.
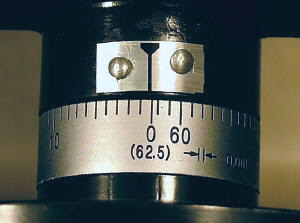
Z-axis movement is achieved by raising or lowering the knee assembly that supports the table. The Z-axis handwheel is located just to the left of and below the Y-axis handwheel, making it easily accessible.
To provide better mechanical advantage to raise the heavy assembly, the leadscrew for the Z-axis has a 32-TPI thread, translating to 1/32″ or 0.03125″ per rotation. The calibrated scale is marked in divisions of 0.0005″ or half a thousandth but still is divided into 62.5 divisions, which could be a source of confusion for the unwary.
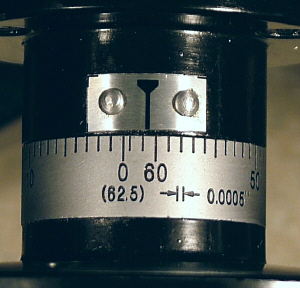
All three axes move along dovetailed slides. Gib strips are provided on each axis so that the tightness of the dovetail slides may be adjusted and maintained as they wear in over time. This ensures that a smooth, precise fit may be maintained for the life of the machine.
Spindle
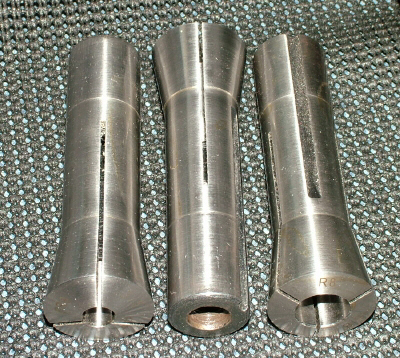
The spindle is an R8 taper, so it will accommodate a wide range tooling. A drawbar extends from the top of the head down through the spindle and mates with the thread in the shank of the tool to hold the tool securely in the spindle. A set of R8 collets in the sizes of the end mill shanks that you frequently use is a mandatory accessory.
A suitable set of collets can be purchased inexpensively from most any machine tool supply company. The tapered end of the collet mates with the corresponding taper in the spindle and clamps very tightly around the tool shank as the collet is drawn into the spindle by the drawbar.
Motor and Electronics
Motor and Belt Drive
Driven by a 350 Watt DC motor, the same type used on the X2 mini mill, the U1 has plenty of power for its size and intended use. Unlike on a lathe, where large diameter workpieces can bog down the drive motor, on a mill, the motor is driving only the cutting tool, which on a mill of this size typically is an inch or less in diameter. Therefore the power of the motor is not so critical as on a lathe.
The motor drives the spindle through a toothed belt: simple, efficient, quiet, reliable. Just the way we like it. Additionally, the belt serves as a shock absorber in the event that too deep a cut is taken, or an obstacle is struck by the cutting tool (how could that happen?) protecting the drive train from damage.
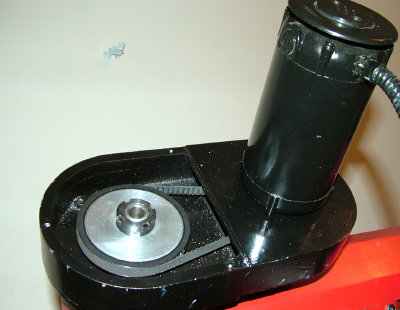
A tough plastic armor protects the electrical cable from the rough treatment typically found in the home shop environment. From my experience with these on other Sieg products I can testify that they will stand up to many years of hard use.
The cable ends in a sturdy plug that mates with a socket on the side of the column. Until you get some practice moving the head between the horizontal and vertical positions, it’s a good idea to unplug the cable while moving the head so that you don’t place excessive stress on the cable.
Electronic Controls
A small box mounted on the left side of the column houses the electronic controls:
- Power On/Off switch and Emergency Stop
- Fault indicator lamp
- Power pilot lamp
- Speed control
- Fuse holder
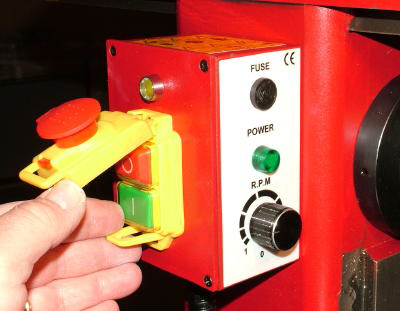
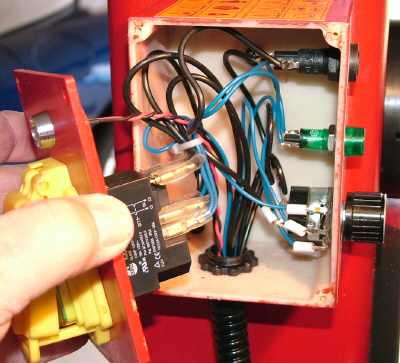
The power ON-OFF (0-1) switch is under a cover that functions as an emergency stop button. When the mill is running, the cover sits loosely over the ON and OFF buttons. Punching the red button on the cover stops the mill and resets the motor; to turn it back on the RPM knob must be rotated fully counterclockwise and the green ON button must be pressed.
As on many other Sieg machine tools, the motor speed is continuously variable from about 200 to 2000 RPM with strong torque supplied by a DC power controller. This obviates the need to move belts between pulleys to change speeds which was (and still is on many machines) the standard way to change spindle speeds.
The variable speed drive is a real convenience and time saver; you can even change speeds in the middle of a cutting operation if it becomes apparent that the current speed is not ideal.
The RPM control knob must be rotated fully counterclockwise until a click is heard or felt before starting the motor. This safety feature ensures that the motor will not start at high speed when the ON button is pressed and also prevents the motor from starting unexpectedly after a fault condition of if power to the mill is interrupted by a power failure or tripped circuit breaker.
The yellow Fault Indicator lamp illuminates if the motor stalls from taking too deep a cut or if the ON button is pressed without first resetting the RPM knob to zero. The power supply senses when it is overloaded, and shuts down. To restart the mill, the speed control knob must be turned fully counterclockwise and the green ON button must be pressed.
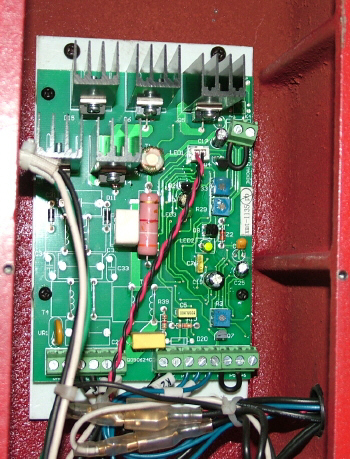
Tucked away in the column, the electronic speed control board is well protected from metal chips, dust and lubricants. The board has a clean modern design using discrete components. While the early (pre-2005) controllers had just two power MOSFETS, this one has five.
Sieg continues to evolve and improve their controller designs to achieve maximum power and reliability. I have used and tested quite a few of their machines in the last five years and have not had any problems related to the speed controllers, so they seem to be having good success with this effort.
Since the column acts as a convective cooling tower and heat sink, no fan is needed for cooling. When the motor is not running, the U1 is silent.
Vertical Milling
When used as a vertical mill, the spindle assembly is mounted in the support casting at the front of the overhead arm.
Unlike the mini mill and the Sieg X3, SX3 and SX4 mills on which the table is at a fixed height and the head moves up and down the column to adjust the cutting height, on the U1 the height of the head is fixed and the cutting height is adjusted by raising and lowering the knee assembly that supports the table.
Aside from this difference, vertical milling on the U1 is similar to milling on the mini mill. The workpiece is held securely in a milling vise or clamped directly to the table using a clamping kit. An end mill or other cutting tool suitable for the task at hand is installed in the spindle and the workpiece is moved into the rotating cutter by moving the X-, Y- and Z-axis handwheels to remove material from the workpiece.
Although the U1 is not much larger in size than the X2 and SX2 mini mills, at about 210 lbs. it is nearly twice as heavy. That extra mass, combined with larger and stiffer column enable the U1 to take somewhat more aggressive cuts than the mini mills. In the photo below, I’m using a 1″ diameter end mill with a 3/4″ shank to surface a small workpiece.
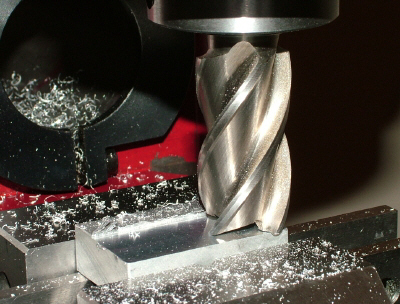
Acting as a natural shock absorber between the motor and spindle, the belt drive makes it safe to do flycutting to get a nice surface finish over a wide area. On the early mini-mills, gears were used to drive the spindle and teeth sometimes got sheared off the gears if you were flycutting and took too deep a cut.
Now, the newly designed SX2 mini mills use belt drive so are free from this risk.
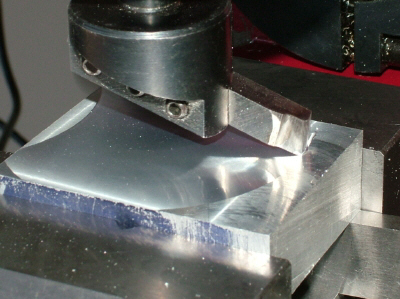
In this example, I’m finishing the whole surface of the workpiece in one pass.
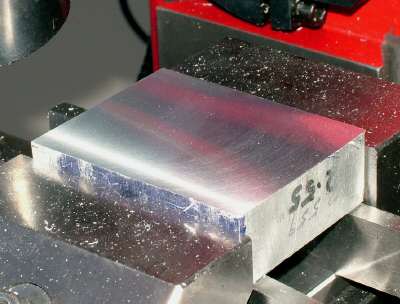
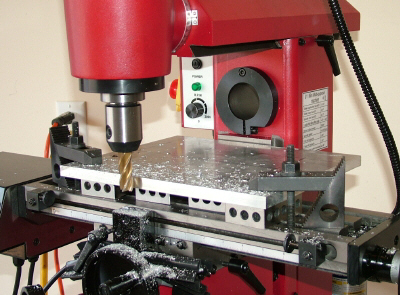
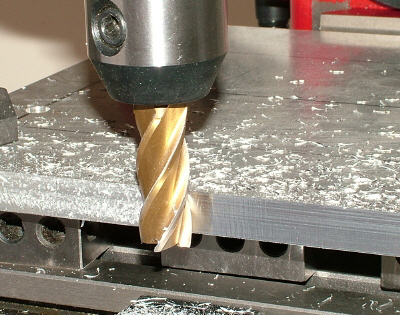
As I mentioned earlier, the spindle usually is positioned over the center of the Y-axis range, but can be moved farther forward to accommodate larger workpieces. In the photos below, I took advantage of this feature to finish the edge on a 9 x 11-1/2″ piece of 1/2″ thick aluminum plate.
Note that the spindle is positioned beyond the front edge of the table. Several 1-2-3 blocks are used underneath the workpiece to provide clearance from the table. In this setup, there was sufficient headroom to use an end mill holder to hold the cutting tool.
Horizontal Milling
The last time I used a horizontal mill was back around 1974 as part of a training exercise for an engineering machining class. We used it to cut splines along a tapered cylinder and to cut gear teeth.
In horizontal milling, a circular cutter is supported along a shaft, or arbor, that extends from the column out to a support bearing supported by the overhead arm. A series of spacers along the arbor determine the position of the blade or blades.
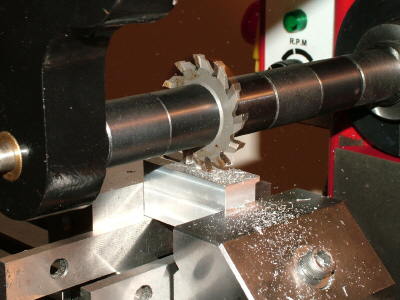
When using a single cutting blade, the position of the spacers usually is not critical, but in certain types of production milling operations, two or more cutters may be separated by spacers of a specific length conforming to a dimension of the workpiece.
This type of operation, called gang milling, can be a great time-saver in a production environment since multiple slots, faces or shoulders can be cut in a single pass. For example, the illustration below shows how multiple cutters might be used to finish the ways of a lathe bed in a single pass.
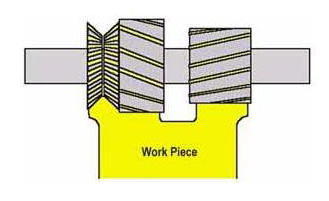
This type of operation is how the horizontal mill earns its place in the production machine shop – especially where many of the same type of object will made over and over so that no time is lost in changing the setup.
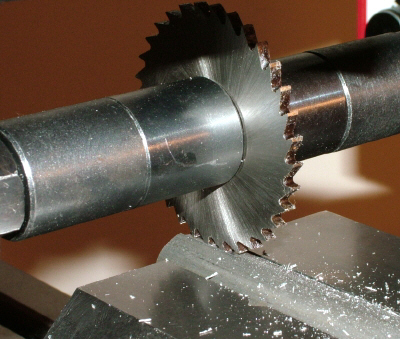
For my first test, I milled a groove into the flat top of a small workpiece. Note that, like on a table saw, the work is fed into the teeth of the cutting tool, from right to left in the photo.

As with all metal cutting operations, rotational speed of the cutter and rate of feed into the cutter should be chosen according to the type of material and depth of cut. For home shop operations, these factors aren’t very critical and a little experimentation, starting at slow speeds and feeds and shallow cutting depths, will soon help you find effective settings.
In this next photo, I’m performing a similar cut, but this time to mill a keyway into the end of a round steel shaft. I’m using a different cutting tool in this case.
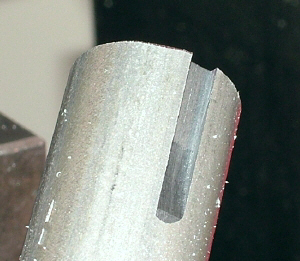
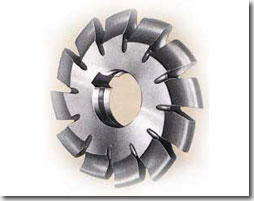
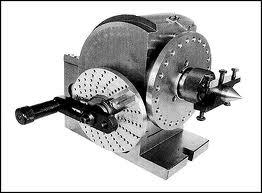
Of course, there are many other operations that can be done with the horizontal milling setup. Milling gear teeth using a specially shaped cutter and an indexing head is one such operation, but I don’t have the cutter and head available to demonstrate it.
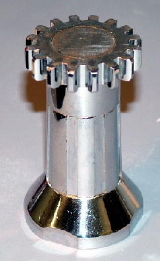
A specially shaped cutter is used to cut the profile of the teeth so that they mesh smoothly. The indexing head rotates the gear blank just the right amount to cut each tooth in turn.
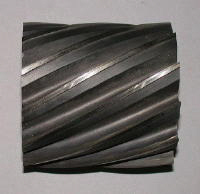
Slab cutters are used to remove a broad swath of material in a single pass.
Switching Operating Modes
Although a number of steps are involved, moving the head assembly between the horizontal and vertical orientations is reasonably quick and simple, taking about 2 minutes after it has been practiced a few times.
The head assembly weighs about 21 lbs. so you need to have secure footing and position yourself closely beside the machine when lifting it. For me, this was most easily done while standing close to the right side of the mill.
One thing you have to watch out for is not to put strain on the power cable that runs from the side of the column to the head assembly. Conveniently, Sieg has made this connection with a plug than can be quickly removed while moving the head. After a little practice, I found that I could move the head with the cable still connected.
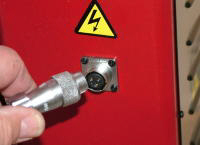
To convert from vertical milling to horizontal milling, the following procedure is used:
- Verify that the OFF button has been pressed and that the speed control knob is in the fully counterclockwise position.
- Press the Emergency Stop button to the locked position. This puts the mill in a safe condition so that it can’t start.
- Remove any cutting tools and collets from the spindle.
- Use a 5mm hex wrench to loosen the spindle retaining ring.
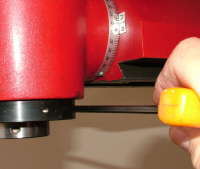
- Using a secure grip and footing, slide the spindle assembly from the vertical support casting and lower and slide it into position into the horizontal shaft opening at the back of the column.
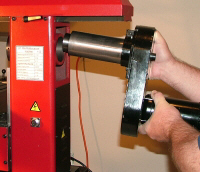
- Align the motor assembly so that the pulley cover and motor are positioned downwards, aligned with the column.
- Use a 5mm hex wrench to lock the horizontal spindle retaining ring.
- Loosen and remove the vertical spindle support.
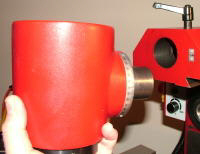
- Install the R8 arbor into the spindle and secure it with the drawbar.
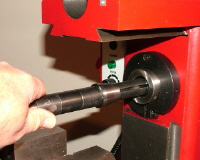
- Install spacers and cutters onto the horizontal drive shaft as needed.
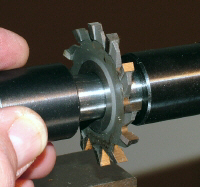
- Slide the overhead arm towards the front of the mill and lock it in position.
- Replace the retaining nut on the end of the shaft and tighten it finger-tight for now.
- Slide the arbor support over the end of the horizontal shaft and onto the dovetail on the support arm so that the end of the horizontal arbor passes all the way through the brass bearing. Then lock the casting in place on the support arm.
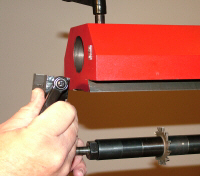
- Put a few drops of oil on the arbor where it meets with the bearing.
- While using the spindle retaining tool to prevent the spindle from rotating, tighten the large nut on the drive shaft. This nut must be reasonably tight to prevent the cutting tools from slipping independently of the shaft rotation.
Note: A reader experienced in the use of horizontal mills emailed me with the following information. I therefore modified the steps above to take this good advice into account. Thanks for the tip, Charley!
When tightening the arbor nut on a horizontal mill, it is standard practice to have the outside arbor support in place. If you don’t, you can “spring” the arbor and cause it to “run out”. It doesn’t take that much bending force out there on the end to do that.
To convert from horizontal milling to vertical milling, the following procedure is used:
- Verify that the OFF button has been pressed and that the speed control knob is in the fully counterclockwise position.
- Press the Emergency Stop button to the locked position. This puts the mill in a safe condition so that it can’t start.
- Remove the horizontal shaft support from the end of the overhead arm. Be careful not to lose the small gib.
- Remove any cutting tools from the horizontal arbor
- Replace all the spacers and the nut on the arbor
- Using the spindle retaining tool to prevent the spindle from rotating, loosen the drawbar.
- If necessary, tap the end of the drawbar to free the horizontal shaft from the spindle taper.
- Remove the horizontal shaft and store it where it will not be damaged.
- Align the locking clamps just inside the overhead arm so that the spindle support casting can slide in.
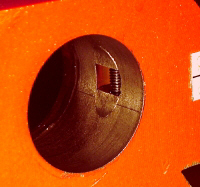
- Install the spindle support casting into the overhead arm
- Tilt the spindle support casting about 30° to the right and lock it in that position.
- Use a 5mm hex wrench to loosen the horizontal spindle retaining ring.
- Unplug the motor cable from the side of the column.
- Using a secure grip and footing, slide the spindle assembly from the horizontal opening and lift it into position into the vertical opening.
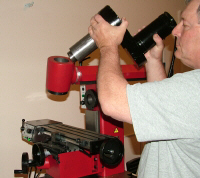
- Align the motor assembly so that the pulley cover and motor are positioned towards the back side of the mill.
- Use a 5mm hex wrench to lock the vertical spindle retaining ring.
- Unlock the head assembly and rotate the head until it is in the vertical 0* position.
- Lock the head assembly.
- Plug the motor back into the socket on the column.
Conclusion
The U1 multi-purpose mill is robust and well-made. For the home shop machinist and small industrial shop, it brings within reach the capabilities of horizontal milling, without a large dollar investment or the need to transport and set up a large, heavy industrial-class horizontal mill. At the same time, it provides vertical milling capabilities.
I believe that the U1 is best suited to owners who have a specific hobby or small-scale manufacturing need that takes full advantage of the horizontal milling features. If your needs are mainly for vertical milling, you probably will find the X2/SX2 or X3/SX3 mills to be more versatile, due to their greater head room and three-spoke handwheel feature for drilling. On the other hand, if you need to do a lot of repetitive linear milling or gear cutting, the U1 may be the better machine for you.
Grizzly is now selling the U1 mill as P/N G0727.
Sieg’s web site shows another larger variant of the U1: the U2. I haven’t seen one of those yet, but it looks like it has more headroom and a 3-spoke handwheel for drilling and a large brushless DC motor. If so, it may be a really nice combination of horizontal milling, vertical milling and drilling capabilities. The specs also refer to grinding, so that may be yet another feature of this new mill.
